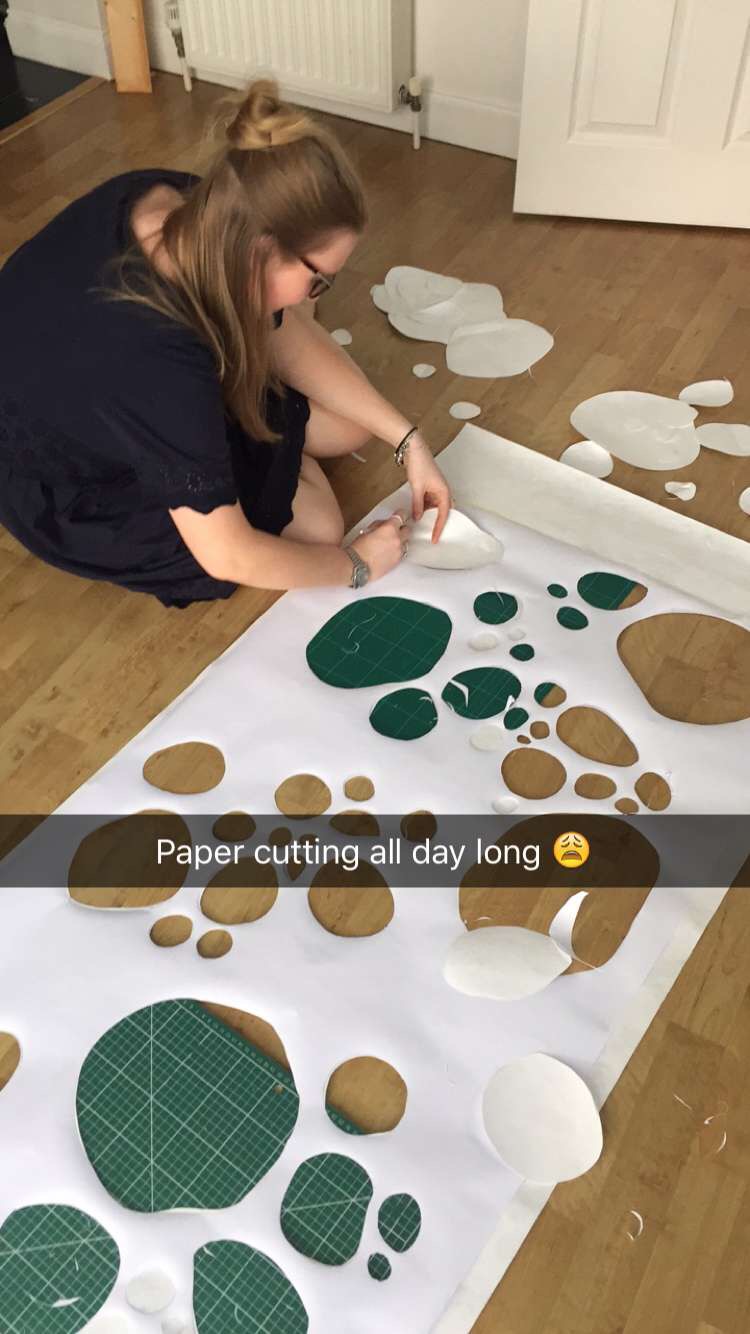
After the successful day of testing that our designs fit the brief and looking at how to unsure a professional outcome, all that was left to do was the post production stages of the project. This started with a full day of paper cutting and measuring in order to create a slick working process when we came to set up the final window display. When we initially measured the windows at Smash Bang Wallop, each measured 77cm wide by 200cm high. Therefore, as a team we agreed to allow for an overlay section, meaning that our panels were 80cm in width and then 250cm high as the panel will fall further than the standard glass frames. As mentioned before we are also using a mix of different pattern work so as when each of the panels cross one another both of the cut out areas can be viewed. The test work which was placed within the window as a mock up, were surprisingly useful as this meant that we were able to trace the successful areas without marking the Tyvek with pencil. The Tyvek, although when cut created a sharp crisp edge, had a delicate surface meaning that we had to be cautious when leaning to avoid indentation. Although the measuring was tedious, cutting the dinosaur and crystal palace shapes was rewarding as our design came to life.
To keep the panels from moving when the door is opened and to help up fix the paper to the ceiling, we planned a number of wooden batons to be glued at the top and bottom of each panel. This was my task over the bank holiday weekend, to cut and drill the wood to size so as we could then glue and fix these easily on site. Once the wood was drilled this meant that we only needed to screw these in place at the shop as the ceiling was wooden also (the material was soft enough to fix without drilling). The problems we encountered on the day of installation was actually getting all the parts there dry, as the weather was so awful and we didn’t know how Tyvek would survive the rain. Fortunately, it didn’t experience the English weather and we created a make shift studio in the children’s room at the back of the shop. This is where we glued the parts together using industrial strength glue, and prepared for the fixing. All ran smoothly and looked professional when hung to the ceiling. When the Tyvek was rolled, this gave some minor indentation and curving which we are hoping will fall out when the paper settles into position.
This is our blurb which will accompany the window
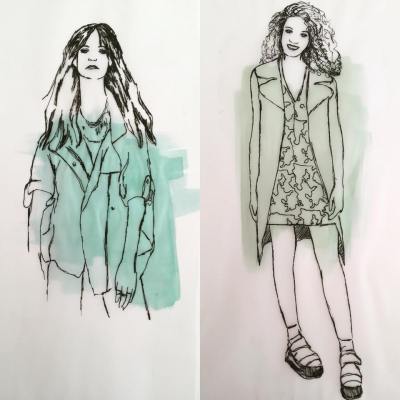
Hello. We are a team of 2nd Year B.A. Illustration students from the University of the Arts London, London College of Communication. Our project brief was ‘Through the eyes of the Window’. The design has been inspired by the heritage of Crystal Palace looking at both the Palace itself and the original dinosaur exhibits which accompanied the structure. The cut out shapes not only reference the glass structure but also the skin of the dinosaurs. Our overall aim was to bring together the history of Crystal Palace and the beautiful items within Smash Bang Wallop.
We hope you enjoy looking at it.
The plan is to now visit again next week to add Harry’s illustration hanging between the layers we created today and to film a small video representation of our window!
Below are some images which walk you through our process and a link to Smash bang Wallop’s Facebook page.

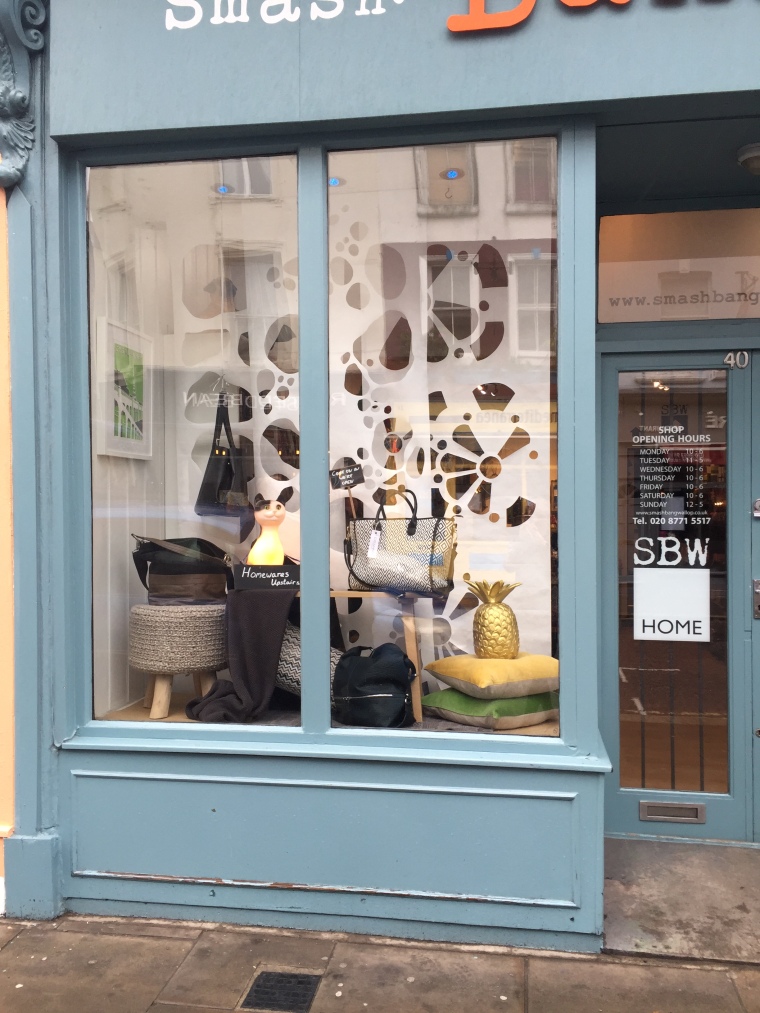


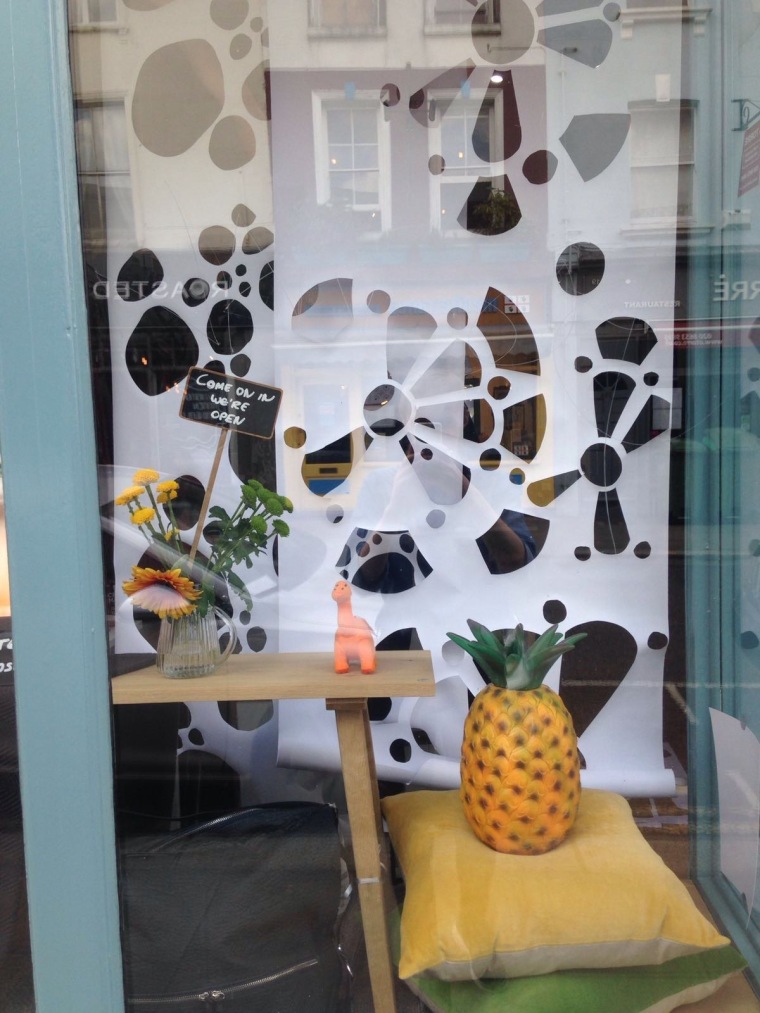 Today we went over to crystal palace to place some test designs in Smash Bang Wallop’s window so as we had a good idea of which patterns work well together and the size that the cut out sections need to be. Of course the mock up pieces that we tested were on standard A1 and lining paper, but the material worked better than we had hoped! We were originally thinking that we would need to fix both the top and bottom of the panels to a hard surface, but the weight of the paper allowed the piece to fall without curling. Katie’s experiments created the best impact as they were two meter in length meaning that we got an accurate idea of how the final back drops will look like when installed. We decided to have three panels on the left hand side window which will overlap slightly. These will be made up of different cut of shapes inspired by both dinosaur skin and crystal palace itself. Although these are very different in nature, the geometric and organic lines complement each together to create an atmosphere which is reminiscent of the area’s heritage. The arched window will also have one panel which will spread across the whole space. This will be cut in the same way as the left hand side window so as the whole display and work together as one. This is yet to be discussed in full, but there may also be a possibility of placing another panel slightly in front to gain a similar overlapped section.


